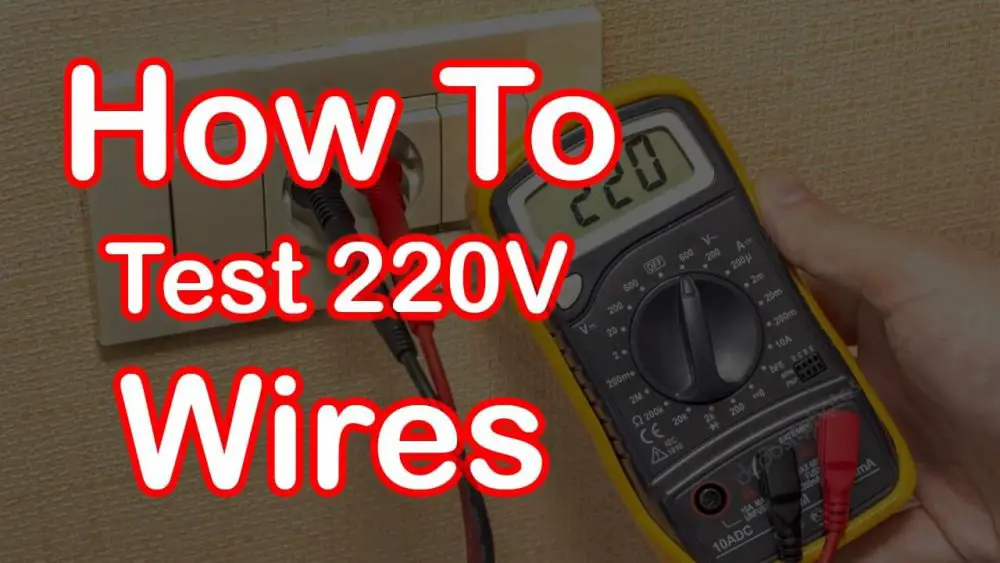
How To Test The 220 Voltage Wires?
To check the 220 voltage wire, we require a multimeter and a power circuit, and we will tell you the voltage present in a wire and the difference between 110V, 220V, and 240V.
Electricity flows through circuit wire at 120 volts, but it is generally referred to as 110 volts. Likewise, electricity of 240 volts is typically referred to as 220 Volts. It consists of two 120-Volts circuits and a ground wire to form a 240-volt circuit. We install a 220-volt circuit typically to provide power for heavy-duty appliances, such as air conditioners, clothes dryers, stoves, ovens and water heaters. Now we are performing how to test your 220-volt wire circuit to help you diagnose your electrical circuit problems.
Step 1
If we observe a 220-volt wall outlet, it usually has three openings: two identical slots diagonal at 45 degrees, but (sometimes vertical), and one middle slot is found lower than the two diagonal slots. Each vertical slot carries 120 volts whereas the third or the middle slot connects to the earth.
Step 2
Turn on the multimeter and select the rotary dial of your multimeter up to a range of 240 volts A/C, and the two probes connect the multimeter jacks, i.e red and black. Be careful to avoid touching the tips of the probes while in function to protect yourself from electric shock.
Step 3
Touch the metal end of one test lead into one of the diagonal 120-volt slots, and touch the metal end of the other test lead into the next diagonal slot. Now observe the reading on the multimeter screen. Both the 120 volts circuit wires show a reading of 220 volts in a circuit wire. This shows that the circuit wire is producing a total current of 220 voltages. The reading on the multimeter should be approximately 240 volts. If it does not, that means one or both wires of the circuit is not working.
Step 4
Select the dial of the multimeter to a range of 120 Volts. Touch the metal tip of the red lead into any of the diagonal slots of 120 volts. and insert the metal tip of the middle slot or earth slot. Your multimeter measures approximately 120 volts A/C. If the reading is different, then assume the circuit is faulty. Repeat the same procedure in the other 120 volts diagonal slots parallel to each other to find out if the circuit is in function.
Table of Contents
How to check 220 Volts Outlet Wires?
Step 1
To take precautionary measures, turn off the circuit breaker that supplies power through the 220-volt outlet. This measure may reduce the chances of getting any harm from the circuit when accessing the outlet wires. It would be a great help if you were careful while working with electric equipment. So, you must wear specific electric safety gloves or rubber gloves used for household work. If you have latex-coated gloves, use them over the rubber gloves for safety purposes while playing with the hot wires.
Step 2
Now remove the cover from the 220-volt outlet receptacle. Next, use a screwdriver to remove all the screws that secure the outlet cover in the panel. Now you may see the receptacle plug inside the outlet box.
Step 3
Certainly, remove the receptacle plug from the box and remove the two small screws holding to fix the receptacle in place. Now you may take out the receptacle from the mounting box.
Step 4
Upside down the receptacle so that you would quickly see where the wire connects. Four wires are connected to the four screws marked with the designations “X,” “Y,” “White”, and “GND”. The “X” and “Y” screws connect to either the red or the black wire. The “White” screw connects to a white neutral wire. Finally, the “GND” screw connects to the ground wire, which will be green or bare.
Step 5
Set the rotary dial to 250 Alternative Current (A/C) and touch the multimeter to a metal object or electrical box just to check if it is working well. The multimeter allows you to measure a reading for the 220-volt wire.
Step 6
You have to check the multimeter while attaching the test leads to a wire from the main electricity circuit. If the multimeter measures voltage between 110-120 volts ( those countries have 220 or 240 volts, measure their values accordingly), and the given light for the hot wire in ON, this concludes that the wiring is hot.
Step 7
While using an analog multimeter the scale needle should be between 110-120 V. The wire connects to the heating appliance, such as hob, hob extractor, oven and water heaters, usually, all of these range from 240 to 250 V. Don’t worry if you are getting a surge in the volts while checking such appliances, because these are high ranges appliances.
Step 8
If you touch one test leads to the “X” screw in the outlet and the other test leads to the “GND” screw in the outlet. You should observe a reading of 240 volts. Likewise, when you check the grounds you should receive a reading of 240 volts between the “Y” screw and the “GND” screw. If one wire or both the wires indicate a reading of zero voltage, this indicates that you have an open ground conductor.
How to determine if an electrical wire is hot?
Once you have started to check through the wiring, you must identify the wire that gets hot while in use. The hot wire can cause a short circuit leading to the worst complications. Make sure that you have all the required devices with you in your toolbox while testing the hot wire. You must have a tester and multimeter, no matter whether digital or analog both can work the same.
Step 1
Take extra precautions while playing with the hot wires, and take all safety measures and devices required to test.
Step 2
Electrical wires are always hooked up before it connects with certain switches or buttons. To test the circuit try to turn on the respective power switches or control buttons to let the electricity flow into the wire. Flip the main switch twice or thrice to make sure that the wire is not going to be hot during this on and off electricity flow.
Step 3
You need to check every wire one by one repeatedly in the same procedure. By that, there is a chance to determine the actual hot wire among all the electricity wirings. First, trace the root of the wire by following how it connects to the power board. Then, you need to test the hot wire with the help of a multimeter to identify the damaged wires while taking the voltage test measurements.
Step 4
While testing every wire one by one, the best way to mark the mal-functional or the hot wire is to stick a white paper tape and to identify it again write H for hot and N for No Current. This tip will help in assisting the electrician with working fast and hazardless.
How do check Continuity for Long Wires?
While testing the electric wires, you must not forget the lines that carry electricity in the backyard or lighten your garden. The continuity of power in the long wires is essential for smooth working. So, let’s go through the steps for checking long wires:
Step 1
It is a common phenomenon that we try to resolve an issue unknowingly. Therefore, it would be best to understand it completely especially when you are checking the continuity. Therefore, it is imperative to learn the basics of power continuity in long wires.
Remember! The electric wires are working not only as a connector but as a resistor. When we talk about a long wire, the resisting capacity is increased because the electrons collide with the protons more times than in short cables. This phenomenon causes an interruption in the electrical flow.
Step 2
At this step, you need to prepare the multimeter. Turn the multimeter ON and move the dial selector to OHMS settings. It should display an open-loop or 1. The multimeter is ready to test the resistance as it’s a significant measuring scale. Connect the test leads while fitting the black probe in the COM port and the red lead in the voltage port. Be careful while placing the probes in the correct jacks.
Step 3
So we start testing a long wire for continuity. It is pretty straightforward. For that purpose, we will use the best quality digital multimeter for checking resistance. To start the multimeter power it to the ON position, you may use a digital multimeter or an analogue multimeter both will give you accurate readings.
Step 4
When we are carrying out the test of long wire continuity, we need to set the multimeter selector to 200 Ohms. Why? you must be thinking, generally, we use short ranges to test electric devices or components, whereas we use high ranges to test a long wire.
Step 5
Now, attach the test leads to the wire and observe the readings. If you get a reading of up to 3.00 or any figure close to it, whereas if the reading is far less than 3.00 it means that this shows the wire does not have electrical continuity required for the appliances.
Step 6
Once you finish with the testing, make sure to turn off the power supply to the appliances and also detach the probes and turn off your multimeter device.
DIY tips and tricks for checking the wire
Hopefully, you have learned everything explained on this page regarding checking 220 volts of wires using a multimeter. A quick review of the tips and guidelines may help you for your safety.
- when ready for checking wiring you must wear electric working costumes and gloves
- Always get the right gadgets in your toolboxes such as testers, extra wires, and the best budget multimeters
- Always turn off the electric supplies while working
- Learn to adjust the setting of multimeters as per the guidelines, use the manual script
- Make sure you connect the probes to appropriate ports
- Observe and note down the readings carefully on your digital device
- While working first mark the damaged or hot wires appropriately with the help of electrical coloured tape
Testing 240 Voltage in a Wire
Before testing the voltage, check if the wires are live for that; use a voltage tester. A non-contact voltage tester is excellent, especially for wires that exist behind insulation or a socket, or a digital clamp meter will also tell you the voltage without any hazard.
If the wires are exposed or touch the metal frame, it is necessary to use a voltage tester.
A voltage tester would not tell you the amount of voltage. It can only show you the voltage in the area. When you touch any wire or metal, it simply lightens up, or the tester produces a buzz or chirp to tell you that there is any voltage.
If your voltage tester tells you the wires are live, you may check the voltage by using a multimeter.
How to check the 240 voltage with a multimeter?
Turn on the Multimeter:
Move the selector dial to select the marked V with an alternating current symbol (~) next. This function comprises several numbers which indicate the different ranges of voltage.
Set the dial selector to the lowest number that is higher than the expected voltage in the wires. In the UK, this is 240 Volts. Now set the multimeter to the required readings above 240 Volts.
So we are selecting the correct voltage range to increase accuracy in measurement and perfect resolution.
All the multimeters do not require this step:
For example, if your multimeter has an auto-range feature, then it has no numbers on the selector scale. Instead, you need to set the dial to V~, and the multimeter will automatically select the correct range as it is measuring the voltage.
Next, connect both the probes to the multimeter jacks. The black probe goes into the marked jack COM while the red probe goes into the jack marked VΩ.
To Test The Exposed Wires:
- You must be extra careful when measuring the voltage of the exposed wire.
- Touch one of the multimeter probe’s tips on any metal surface nearby those exposed
- wires. We suppose the metal object will act as the ground reference.
- Then use the other multimeter probe and touch the metal tip of the probe on the exposed wires and check the voltage of each of the wires respectively.
- Every House wiring consists of three-wire circuits. Only one wire has power or voltage of about 230 volts, and this is the live wire. The remaining two neutral and ground wires must indicate a reading of close to zero while observing.
- 1-Now measure the live wire and neutral wire to measure the voltage present in the live wire. Mark the red colour tape on the live wire and white colour tape on the neutral wire to identify the wires.
- 2-When you measure ground wire and live wire it will give you the voltage measurements of a live wire.
- 3-In the end measure the neutral wire and ground wire to check if there is any stray or ghost voltage in the neutral wire.
Frequently Asked Questions:
The leading causes of electrical wires are a mechanical failure, ageing of the wires, degradation of the cable sheath, heating of the cables, moisture in the insulation, electrical overloading, UV exposures and rodent attacks.
The simplest and easiest method to make an exposed wire safe is to use electrical tape on it. Electrical Tape can help to join the torn end of the wire or lose wires that do not fit in the cap. In addition, electrical tape over the exposed wire is used to protect yourself and the house from electrical wirings.
Conclusion:
We can use different types of multimeters either an analog multimeter, an auto-range multimeter, a manual multimeter or a clamp meter. This is the most significant
way to check the voltage in a house wiring, whereas the troubleshooting in the voltage is supposed to be in a live wire or it is the neutral wire. We may use both the wires to check with the multimeter. The multimeter will observe the exact measurements of the default voltage or any higher values due to an exposed wire or any other wiring failure or stray voltage or any ghost voltage within the wiring system.
Related posts:
Best Voltage Testers in 2022 Reviews & Buying Guide


