
How to check 240 voltage with a multimeter 2021
Voltage is the amount of electricity that could flow between two points. These two points could be an outlet socket and the equipment you’re using, or an outlet socket and your main power source. Air conditioners, radiators, boilers, and occasionally electric hotplates, hoods, and vacuums all use electricity to cool and heat dwellings. These devices are all high-power consumers. You can check the voltage of your household circuitry, your appliances, or your batteries. You need a digital or analog multimeter or a voltmeter to check the voltages. Also, the voltmeter’s only purpose is to measure voltage.
In our case, we are going to check the 240 voltages, we use a multimeter device. It has a selector dial in the centre of the device. Rotate up to 360 degrees. It contains distinct functions to select, for example, A/C voltage check, D/C battery check, etc. If you are new to a multimeter, then read the manual guide to select the variable functions of a multimeter. We use two ports, that is red and black ports, in a multi-meter device to operate the multiple functions and get the desired measurements. The black port is common, whereas the red port is live or powered. In addition to this, there are two probes, red and black in color. The other end of both the probes is an inlet, like an insert of a lead (probes come together with a multimeter). We will check 240 voltages by these two black and red probes together with the two black and red ports within the body of a multi-meter device to complete the circuit to check the voltage.
Precautions:
Before we can start checking our voltage, we need to know how to stay safe. Do not touch the metal part of a test probe, or you could get a shock. The multimeter will start by making a circuit to measure voltage. Do not join this circuit, or you could get shocked. Make sure that the dial selector on the multimeter is set to the voltage selector before you try to do this. When connected to a voltage source, the multimeter could be damaged if it is set to measure amps or ohms.
The process to check 240 volts, A/C Voltage
- Today we are checking the A/C current; as you can select it from the symbol, and choose the auto range in your multimeter, it is much easier to test a particular voltage.
- Select the outlet to select the voltage. You will place your multimeter leads into the outlet; as you can see by testing this, we have 240 volts, which means there is 240 volts of power available to the outlet, so now we are going to try voltage on a component.
- We move the dial selector to the Voltage range of V~ sign of alternative current (AC). This setting is the same in all types of multi-meters.
- In the United States, the AC voltage range is 110-120 volts. While in many countries this range varies from 210-240 volts.
- Use the multi-meter accordingly.
- Suppose we need to check 240 volts, so we will move our dial selector to 300 volts maximum. If we move the dial to 240 or less, then we cannot get accuracy in our readings.
- To check the 240 Voltage/ AC Voltage, place the RED PROBE into the RED PORT of the multi-meter.
- Similarly, the BLACK PROBE goes into the BLACK PORT of the multi-meter.
- Now the other end (tail) of the RED PROBE goes into the first inlet of the plugin socket, or +ve wire of the socket which is a current wire of the circuit.
- Similarly, the other end of the BLACK PROBE goes into the second inlet of the plugin socket.
- Two heads of the probe in the multi-meter and the two tails of the multi-meter in the plug-in socket.
- The current circuit together with the multi-meter is completed. Now turn on the power switch of the multi-meter.
- The screen of the multi-meter gives you the reading of 220-240 volts, which means the current flow is perfect.
- Alternatively, if you need to check the 240 voltages in the current wire circuit, place the red lead to the (+ve) or current wire.
- Place the Black lead into the other (–ve) wire to complete the circuit. The screen will show the reading of the voltage between 220-240 volts.
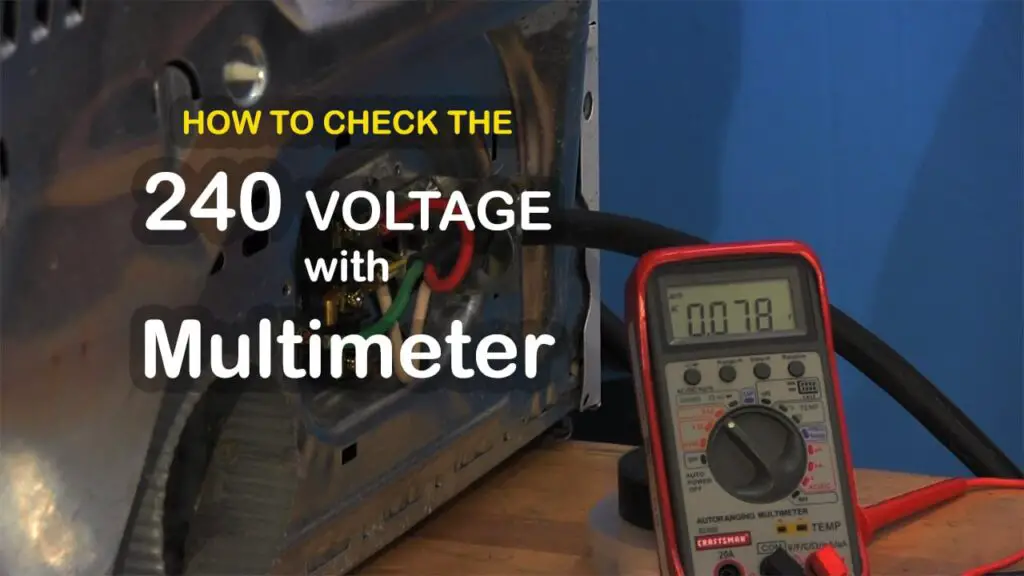
Table of Contents
The difference between 120 V and 240 V
- In the United States, the AC voltage range is 110-120 volts. While in many countries, this range varies from 210-240 volts.
- American 220 volts consists of 2 phases of 110 volts, and European 220 volts consists of a single phase of 220 volts.
- At 120 volts, the transformers used can be more extensive and more expensive. Furthermore, due to the higher amperage supported for the lower voltage, stability is also highly needed.
- Another disadvantage of 120 volts is that the voltage tends to drop when your plug-in high-power consumption. The more consumers you have, the higher the voltage drop is. Considering the drop as a percentage of total voltage, it can affect other devices more in the 120 volt case than in a 230 volt home network.
- There are also a few advantages when using 120 V. First it is the more negligible risk of deadly electrocution. 120 V can be harmful, even though it is considered safer than 220 V.
- An advantage of using 120 V is given by smaller voltage spikes transmitted in the network. For example, when we plug or unplug a device, sometimes, we see a flame. That thing is an electrical arch and sent into the network as a voltage spike. There are also devices such as computer power supplies and other devices that pollute the network with bad signals. For 120 V, they are smaller, conducting a minor interference between different devices using pulses to down-convert the voltage.
How to Test 240 Volts in a Dryer Plug Outlet?
- We are going to use our multimeter to read out the typical dryer plug outlet.
- The test selectors are 30 amps, 125 volts-250 volts. The side of the plug is where your neutral wire would be. So, it is your neutral connection. This site is your ground, or your green wire would go, and there is a hot wire. 120 volts would go to the right-side inlet, and on the other side, 120 volts. We are playing with 240 volts.
- Voltage playing is dangerous if you are unfamiliar with using a meter, working the safety precautions of electricity, or finding professional assistance.
- We have a red lead, and we place it in the bolt, the black lead plugged into the common port.
- We have turned our selector switch to the A/C voltages.
- We are on the ground side, and we read one side of the outlet, and we got our 120 volts, and our measurement readings are 119.9 V.
- So now we are checking the other side, and we got 119.9 V on our multimeter.
- Again, we are going to put our lead in the neutral hole on one side. So far, everything is checking out precisely the way it is supposed to.
- We go from the hot inlet to the paired hot inlet, through my multimeter leads. Each hot lead is 120 volts, so both the hot leads together are 240 volts, and we have observed 239 volts measurements in our device. So, here we have learnt how to check 240 volts in a dryer plugin outlet. So far, everything we checked is good and perfectly done. Do not forget your safety precautions while playing with the voltages.
Why don’t you use a lower voltage for your house current since 240V is deadly?
Whether you use 120 V or 240 V depends on where you live. Both businesses and the government had to decide what to do. To get the same amount of power, you need either high voltage and low current or low voltage and high current. Electricity is frequently transferred using high voltage and low current. Copper is used less because thinner lines can be made (the power loss to heat goes as resistance times current squared). High voltage must be isolated and insulated from the rest of the system due to its massive electric fields.
For safety at home, you need lower voltage and insulation. Both 120 V and 240 V can pass through your skin’s resistance. Your dry skin is much stronger than your organs, which are wet. So, it would need to be much lower (50 V) to be safe. But to get the same amount of power at lower voltages, more current and thicker wires would be needed. So, the most cost-effective choice was either 120 V or 240 V.
How much current is generated from 240 Voltage?
High voltage and low current are used to send electricity to our homes. But as it gets closer to our homes, it changes to a low voltage (240V). The size of the transformer, the size and length of the cable to your house, and a safety device like a fuse or circuit breaker determine how much current is sent to your house.
The maximum current you can draw out of a general-purpose power outlet is 10 amps. This is because that is how the outlet is rated. However, the breaker is usually 16 amps. If you disregard these limitations, the wiring in your house could handle 25 amps before it starts to smoke.
More power will come from more current. Now, the amount of current that can flow through 240 volts is compared to how much current the transformer/generator can provide. It can be anywhere from a thousand amperes to a million amperes.
Therefore, we give you a straightforward answer, most probably, your 240 volts supply at home can supply 0.1 million amperes of current but do not worry, and your home wires will fry when the current reaches only up to 15 Amperes.
How do you know an outlet has 240 voltages?
Before you test your 240-volt wall outlet, you should find out how it is set up. A 240-volt wall outlet usually has three holes: two slots that are the same and tilted at 45 degrees (or sometimes straight up), and a third hole that is lower than the other two. Each vertical space has 120 volts, and the third space, in the middle, is connected to the ground.
PROCESS TO CHECK THE VOLTAGE IN A MULTIMETER
DC VOLTAGE SETTINGS IN A MULTIMETER
To check the DC voltage in the multi-meter, there is a letter (V with a horizontal straight line–together with a dotted line …. underneath the straight line). These show the DC voltage by which you can check battery-operated products, typically the devices that have a computer inside these products.
AC VOLTAGE SETTINGS IN A MULTIMETER
To check the AC voltage, we will continue to move the nob of the dial to a set of ranges of voltage with a letter (V) together with a squiggly line showing the sign wave V~). These represent AC-voltage, to get out of your outlets and in certain electronic equipment.
JACKS OR PORTS IN A MULTIMETER
At the bottom of the screen of a multi-meter are four ports. (Some devices have three ports). Some multi-meters have auto settings and some have manual settings, but the purpose is the same. The device has a reading of maximum volts. Some are 600 volts, while others have a capacity of up to 1000 volts. So you cannot exceed the given volt limit, otherwise, it will damage the device.
Represent letter V with omega sign. To check the voltage and the RED probe goes into this port.
Represent COM. To check the voltage and the black probe goes into this port.
Both are fuse ports, the yellow port is anti-fuse and the white port is a fuse port.
How to check the dc voltage in a multimeter
- To check the voltage:
- Insert the BLACK probe into the COM-Port and the voltage probe or the RED probe into the Omega-Port and turn on the power button. The screen will show the reading of 0.000.
- Another end of the probe is an inlet lead (like the inlet of headphones). For example, if we check the power of an AA battery, which is a DC battery, and the range of the battery power is 1.5 volts.
- So we will set our meter dial nob to V with a dotted line up-to-the range of 2.00 volts. We will use the maximum range to check the reading. Do not use below the given range of 1.5 volts.
- To check the battery power, we will touch the red lead to the positive end of the battery.
- Touch the black lead to the negative end of the battery so the meter will give a reading of 1.5 volts. (if the battery is new).
- On the other hand, accidentally, if you place the wrong lead on both ends of the battery, it will not hurt anything, it only gives the negative reading, which will be (-1.5 volts).
Now you may understand how to check the 240 AC Voltage in a multi-meter:
Whether it belongs to any brand, the process will remain the same. Besides, for the DC voltage, turn the dial to the DC settings and for the AC voltage, change the nob to the AC settings. On the battery, for example, the voltage necessary for the specific component is listed. For example, with AA batteries, it is 1.5 volts. To set the nob to the setting of 2.00 volts.
How to check the resistance with a multimeter
To find the resistance of a wire:
- The BLACK probe and the RED probe will remain in the SAME ports as we use in AC/DC voltages.
- We use a Pug plugin to check the resistance in the current, so that the other end of the RED leads into one end of the pug plugin.
- Place the black lead into the other end of the Pug plugin.
- Shift the dial nob setting to the RESISTANCE setting given in the multi-meter.
- Suppose the voltage of a Pug plugin wire is 10,000 Ohms.
- Now shift the dial nob to the resistance setting up to 20,000 Ohm and check the screen.
- If the reading is around 8000 Ohm, that means there must be the resistance of voltage in the wire. Or if we get a reading around 10,000 Ohm, which means perfect, there is no resistance in the continuity of the voltage.
How to check the continuity of the voltage-current with a multimeter
- We can also check the continuity of current in a circuit by using these two RED and BLACK leads on a circuit wire. Place the Black lead to the (–ve) end of the circuit and the Red lead to the (+ve) end of the circuit.
- The CONTINUITY of voltage flow will give you a BEEP, or an ALARM to show the flow of current is normal.
- No-BEEP means there is a short circuit or break in the wire, or there is no flow of current, any break in the wire, or a short circuit.
How To Check Voltage Amp In A Multimeter
- There are two more ports in the multi-meter.
- YELLOW is the UN-fuse PORT and WHITE is the fuse PORT.
- Now set the dial nob to the DC setting of the AMP setting, letter A with a line and a dotted line.
- Place the RED probe into the YELLOW port (un-fuse); the BLACK probe will remain in the same port where we have used it previously.
- We use a battery to light the bulb and make a circuit in such a way that the bulb will be in between the RED and BLACK leads and attached to the battery terminals at the respective negative and positive ends.
- We can use this setting to check the bulb whether it is fuse or not, suppose the sample bulb is 2.0 Amp, move the dial nob to Athe MP setting of 3.0 maximum and connect it to the circuit and turn on the multimeter. The reading on the screen shows 2.0 Amp of the energy of the bulb.
Frequently Asked Questions
You are not allowed to connect it because the voltage transformers convert a single phase to 110 or 220 volts. American 220 volts consists of 2 phases of 110 Volt, and European 220 Volt consists of 1 phase of 220 volts
We will use a multimeter and check the outlet with the help of the test leads, and the multimeter screen will tell you whether the outlet is 120 volts or 240 volts.
Another way to check; If you check a socket wire and you find black and white wires, the electrical supplies are likely to have 120 volts. If your socket has black and red wires, your connection wires are likely to consist of 240 volts.
Conclusion
A multimeter is an essential device for DIY users and electricians. However, if you use a digital multimeter for the first time, you need to know its features, functions, and settings. The article describes the complete operation of a multimeter to test 120 volts and 240 A/C volts. And this article is immensely helpful in checking the voltage and its types and useful tools to check the voltage and current supply. And now you will understand the difference between a 120-volt outlet and a 240-volt outlet and the difference between a single-phase 120 volts and two single-phase 120 volts to make it 240 volts. It is extremely important to take safety precautions before checking the voltage because it is life-threatening.
Related Posts:
Test Capacitor With The Multimeter In Circuit


")